
 Home
Home Register
 Log in
Sinnoh Map Making Tutorial
Page 1 of 1

Sinnoh Map Making Tutorial
![]() TorterraOats Sun Sep 14, 2008 9:31 am
TorterraOats Sun Sep 14, 2008 9:31 am
In this tutorial, I will be teaching you all how to make a Sinnoh-Like map of a fake region. It can be named Ligrid or Vighit or whatever youd like. In this tutorial, I will be making a sample region that doesnt have many towns. I will call my region Frewto (FROO-toe)
1. What you need
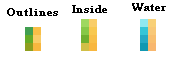
You will need some pictures and colors for making a map. Here they are:
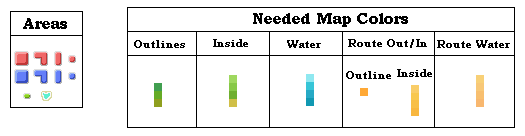
The suggested program to use is Paint. Take that picture, copy it, and paste it in Paint.
2. Getting started
First, take the square making tool and select the Fill Only rectangle, like this:
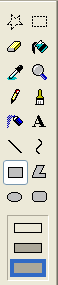
Select the bottom color of the water section with the ink tool, like so:
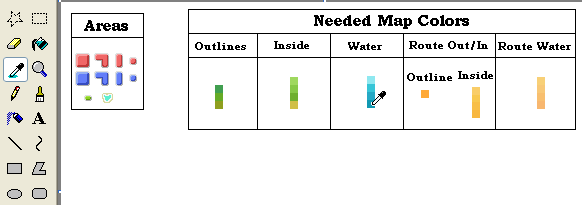
Now, make a rectangle with the rectangle tool. Make it any size:

3. The Region itself
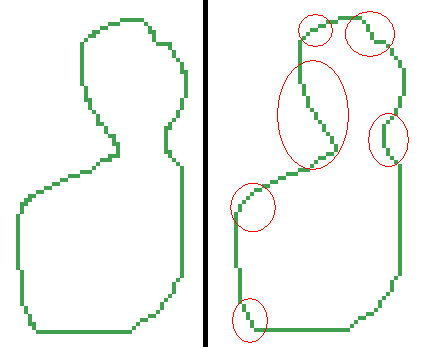
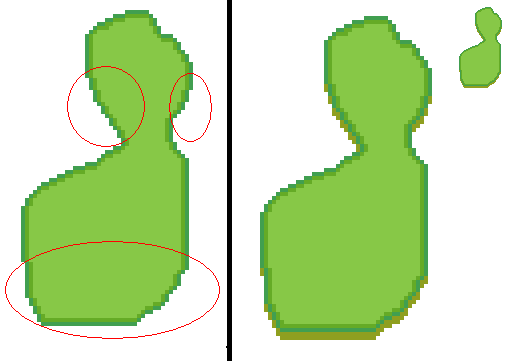
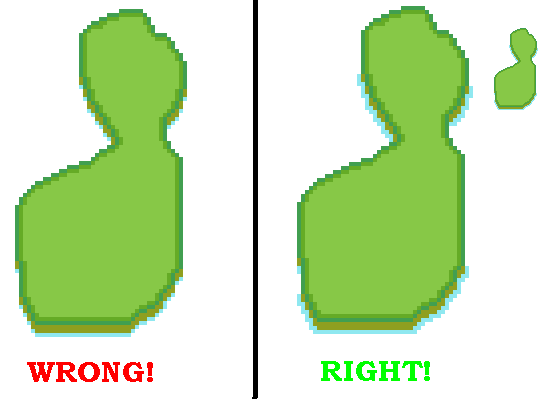
Now we will begin the actual region. Use the ink tool and select the color at the top of the outlines section. Use the pencil tool and make the proper outline. Zoom in the fix anything. Get rid of the strange corners to make it look more curvy:
Now, here is a time consuming part. Take the middle color from the outlines section. Trace the entire inside of the region with that, like so:

So after that, select the color right under the first color in the Inside Section. Select the fill tool and fill the region:

4. Shore Effect
Now, we finished the basics. Now, we shall make a shore for it, like on the Sinnoh map. It will look like this:

So, take the bottom color from the Outlines Section. Anything on the bottom of the figure, meaning anything that is facing down, should have two pixels of that color under it, like so:
Now that you finished that, we can do the bottom outline. Take the top color from the Water section. Start making an outline for it; connect it to be a whole segment, unless it is too far away, like so:
Progress so far:

5. Contour Lines
Contour lines specify the height of certain areas of the region. Simply go to the inside section, take the lightest green, make a shape, and fill it in. Then take the darkest green and make a smaller shape inside that one and fill it in. Finally, take the brown that is right under the dark green, and make the smallest shape in the dark green. That will show the height of mountains in the region. You can add dots anywhere, and also add extensions. Like so:
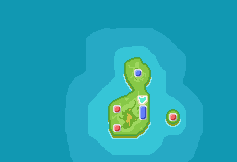
Now, you can do the same thing, but with the water. Take the blue right under the lightest one in the Water Section, than outline your islands and region. Fill it in. Take the next blue under it, and outline the other blue. Fill it in. It should look like this:
6. Cities and Routes
Now it is time to make the cities and routes in the region. Copy the block you want for the city/town, or a lake or green zone. Paste it and place it on the map. Do not place them too close, or routes will be too hard to make. Here is mine so far:
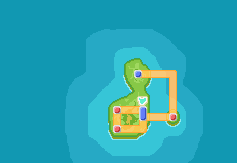
Now, I placed the towns/cities and a lake. Time to start mapping out my routes. Take the color from the Route Out/In Section, and the Outline SUBSECTION. Now map out your routes like so:

Now, the reason I circled the corner is that you have to do that. If a corner of a route is sticking outwards, make it like that, so all corner point inwards. Sorry if that confuses you.
Okay, so now we must fill in our routes. Use this color chart to color it in:
So, after it is colored in, it should look like this:
7. Finishing up
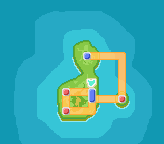
Now, you have nearly finished. Now just trim away excess ocean, fix any mistakes, add what you need, and refine some lines. Then it is done!
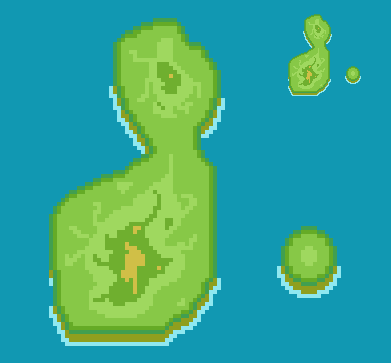
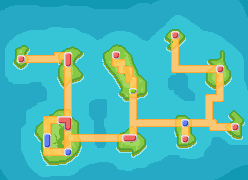
The finished product:
So, that is the end of this tutorial. Have fun designing new regions, or editing past ones!
Examples:
Zenire, a region for a fan fiction I am going to make in a month

Isandico, random region made for no reason
Thank you!
1. What you need
You will need some pictures and colors for making a map. Here they are:
The suggested program to use is Paint. Take that picture, copy it, and paste it in Paint.
2. Getting started
First, take the square making tool and select the Fill Only rectangle, like this:
Select the bottom color of the water section with the ink tool, like so:
Now, make a rectangle with the rectangle tool. Make it any size:
3. The Region itself
Now we will begin the actual region. Use the ink tool and select the color at the top of the outlines section. Use the pencil tool and make the proper outline. Zoom in the fix anything. Get rid of the strange corners to make it look more curvy:
Now, here is a time consuming part. Take the middle color from the outlines section. Trace the entire inside of the region with that, like so:
So after that, select the color right under the first color in the Inside Section. Select the fill tool and fill the region:
4. Shore Effect
Now, we finished the basics. Now, we shall make a shore for it, like on the Sinnoh map. It will look like this:
So, take the bottom color from the Outlines Section. Anything on the bottom of the figure, meaning anything that is facing down, should have two pixels of that color under it, like so:
Now that you finished that, we can do the bottom outline. Take the top color from the Water section. Start making an outline for it; connect it to be a whole segment, unless it is too far away, like so:
Progress so far:
5. Contour Lines
Contour lines specify the height of certain areas of the region. Simply go to the inside section, take the lightest green, make a shape, and fill it in. Then take the darkest green and make a smaller shape inside that one and fill it in. Finally, take the brown that is right under the dark green, and make the smallest shape in the dark green. That will show the height of mountains in the region. You can add dots anywhere, and also add extensions. Like so:
Now, you can do the same thing, but with the water. Take the blue right under the lightest one in the Water Section, than outline your islands and region. Fill it in. Take the next blue under it, and outline the other blue. Fill it in. It should look like this:
6. Cities and Routes
Now it is time to make the cities and routes in the region. Copy the block you want for the city/town, or a lake or green zone. Paste it and place it on the map. Do not place them too close, or routes will be too hard to make. Here is mine so far:
Now, I placed the towns/cities and a lake. Time to start mapping out my routes. Take the color from the Route Out/In Section, and the Outline SUBSECTION. Now map out your routes like so:
Now, the reason I circled the corner is that you have to do that. If a corner of a route is sticking outwards, make it like that, so all corner point inwards. Sorry if that confuses you.
Okay, so now we must fill in our routes. Use this color chart to color it in:
So, after it is colored in, it should look like this:
7. Finishing up
Now, you have nearly finished. Now just trim away excess ocean, fix any mistakes, add what you need, and refine some lines. Then it is done!
The finished product:
So, that is the end of this tutorial. Have fun designing new regions, or editing past ones!
Examples:
Zenire, a region for a fan fiction I am going to make in a month
Isandico, random region made for no reason
Thank you!
TorterraOats- Administrator

- Number of posts : 192
Age : 27
Location : The internet, maintaining my site and forum
Job/hobbies : HTML, Forums, Pokemon
Humor : Who's Humor?
Registration date : 2008-07-04 -

Page 1 of 1
Permissions in this forum:
You cannot reply to topics in this forum|
|
|